Sunday, February 12, 2012

Personalized Photo Letters


Ready for something new? Well I've got another tutorial for lil' old...
Letter photos are all the craze! They're perfect for wedding gifts, baby showers, etc. But rather than using photos that other people take, why not make it a bit more personal? Find letters from a couple's Alma Mater, a friend's hometown or your favorite vacation spot. Be the artist yourself! You can do this!  Once you start looking for letters you will see them everywhere. So start a letter scavenger hunt and then read my tutorial on how to use Picnik to go from a snapshot to a piece of letter art!

Get instructions after the break....

Monday, February 6, 2012

Panini Secret...

Here it goes. I'm about to release Danny and my favorite panini recipe, inspired by the amazing people over at Cowfish in Charlotte. Are you ready to write this down? I'll give you moment to go get a pen...
Food: The best kind of "before and after" makeovers!

The absolute best Panini contains: Sourdough bread, brie, granny smith apple slices and dried cranberries. Don't believe me? Look at the pure joy on this man's face.
happy/hungry husband
And these are the shots I had to take in order to get the above photo. They are titled, in order: "flared nostrils", "take the friggin' picture" and "overly giddy because I love my wife so dearly."

Now go make yo' self an awesome panini. You're welcome.


Sunday, February 5, 2012

Easy Cross-stitch Necklace for Valentine's Day!

I've been wanting to make this necklace for a while and I finally got myself together to do it this year! It was super easy and quick. Here's what I did:

Supplies:
- scrap of fabric
- red embroidery floss
- needle
- 3/4 inch button cover kit ($1.50 at JoAnns or Wal-mart)
- 3/4 inch bezel setting (purchased from Ornamentea)
- chain, jump rings and heart charm (all purchased from Ornamentea also)

Steps:
1. make a cross-stitch pattern on a scrap of fabric with 3 strands of the floss.
2. cut the fabric with the template on the back of the button cover box
3. using wire cutters, take the loop element off of the button back
4. follow the directions on the button cover box to complete the button
5. glue the completed button onto the bezel setting
6. after the glue is dried assemble the necklace with the jump ring, chain and charm
7. wear your new, fabulous valentine necklace!


Thursday, February 2, 2012

Pin-Interest #1

Are you addicted to pintrest? You know you are! And if you're not on pinterst, what are you waiting for? Get yourself over there and start an account! Well we all pin every cutesy-patutsy thing we see, but how often do we actually make use of those pins to make our own lives more awesome? (enter cricket sounds here) This is the start to a personal adventure of turning pinterest-interests into reality, and I hope to have many more. So, without further ado, let me present the very first "Pin-Interest"!

There are so many sting art pins floating around on pinterest. I decided to create my own string art to pay homage to my hometown, lovely Cleveland, Ohio. 


  Here are the supplies you will need for this project:

-wood plaque (i got mine for about a dollar at JoAnn's)
-paint and glaze (both from Michaels)
-plain ol' nails
-hammer
-embroidery floss (i pulled out my stash from my 4th grade friendship bracelet stage)
-felt
-velcro hanger by 3M

Steps:

1. paint and glaze your plaque. Don't skip the glaze! Its a super easy thing to do to make your piece look so much more professional! Look for it in the same section you buy paint from at the craft store.

2. Print out an image of your chosen state. I just searched "ohio outline" in google images. You may have to print it out several times in different sizes until you find the one that fits your plaque just right.

3. Transfer your outline. 
*Robin's super-duper tip: If you don't have transfer paper, don't worry! Turn your paper over and color on the back with pencil. Then turn it over to the right side agian, position it onto your wood and using a lot of pressure, trace your outline. When you lift it you should see your shape drawn in pencil.

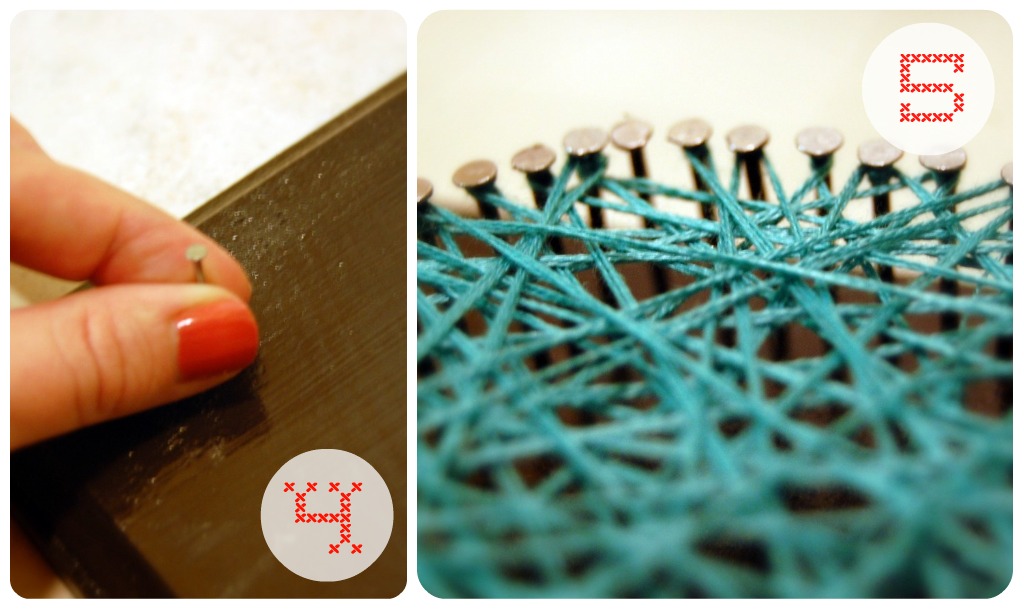
4. Time to pull out that hammer! Hammer your nails in along the line of your shape. Try to nail them close together, while leaving just enough room to move your string in between.

5. Now the fun part! Start stringing! Make a little knot on one of the nails and then start randomly stringing the floss around the nails. Don't be worried about perfection, but try to get all the areas covered. When you are happy with the look make another little knot. I then added a touch of glue to both knots to secure them and make the tails come in neatly.

6. Add a hand-cut felt heart and the velrco backing to  complete your piece of art! Hang and enjoy!


Here is how we arranged it on our wall! The "Love Always" print is a free PDF from my dear friend Martha. (found here) 

Hope you enjoyed my first Pin-Interst. Now go make your own!


Wednesday, February 1, 2012

Sweet, Sweet Surprise


A package of the best cookies eva!
So I have this friend. My best friend. Her name is Katie and she has the habit of making you feel a whole lot better right when you need it. (An excellent quality to have in a best friend, I must say!) I am going to be taking a certification exam in a few weeks and am in the mist of panic/ endless studying/ done with school mode. Today I came home to find this "Good luck studying" package in the mail. I mean, honestly, can there be anything better than a package of homemade cookies??? Yep, didn't think so.
The cookie baker herself. Lovely, lovely friend!
Moral of the story: If you have a wonderful friend like this one (see photos above) don't ever let her go! (Even if she does move all the way to California!)

Monday, January 30, 2012

Testing... Testing.. This is my first post. My hope for this blog is that it is filled with lots of fun crafts, pretty pictures, a touch of humor, a dollop of love, a dash of paprika. WAIT- too much! Anyway, I hope you enjoy. Feel free to comment. Even the thought of a comment makes me giddy!

Your Friend,
Robin