
Are you addicted to pintrest? You know you are! And if you're not on pinterst, what are you waiting for? Get yourself over there and start an account! Well we all pin every cutesy-patutsy thing we see, but how often do we actually make use of those pins to make our own lives more awesome? (enter cricket sounds here) This is the start to a personal adventure of turning pinterest-interests into reality, and I hope to have many more. So, without further ado, let me present the very first "Pin-Interest"!
There are so many sting art pins floating around on pinterest. I decided to create my own string art to pay homage to my hometown, lovely Cleveland, Ohio.

Here are the supplies you will need for this project:

-wood plaque (i got mine for about a dollar at JoAnn's)
-paint and glaze (both from Michaels)
-plain ol' nails
-hammer
-embroidery floss (i pulled out my stash from my 4th grade friendship bracelet stage)
-felt
-velcro hanger by 3M
Steps:
1. paint and glaze your plaque. Don't skip the glaze! Its a super easy thing to do to make your piece look so much more professional! Look for it in the same section you buy paint from at the craft store.
2. Print out an image of your chosen state. I just searched "ohio outline" in google images. You may have to print it out several times in different sizes until you find the one that fits your plaque just right.
3. Transfer your outline.
*Robin's super-duper tip: If you don't have transfer paper, don't worry! Turn your paper over and color on the back with pencil. Then turn it over to the right side agian, position it onto your wood and using a lot of pressure, trace your outline. When you lift it you should see your shape drawn in pencil.

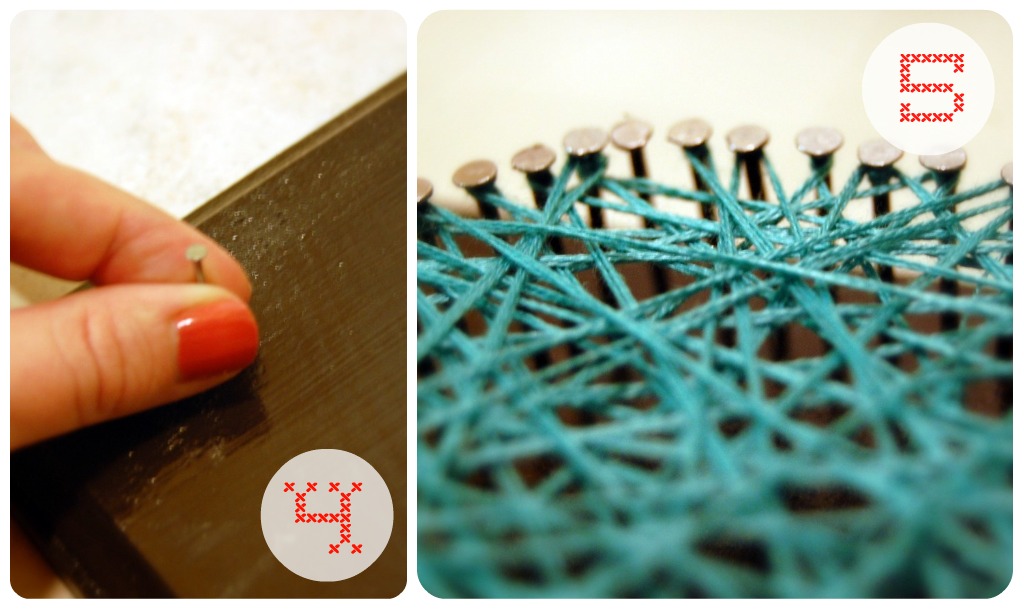
4. Time to pull out that hammer! Hammer your nails in along the line of your shape. Try to nail them close together, while leaving just enough room to move your string in between.
5. Now the fun part! Start stringing! Make a little knot on one of the nails and then start randomly stringing the floss around the nails. Don't be worried about perfection, but try to get all the areas covered. When you are happy with the look make another little knot. I then added a touch of glue to both knots to secure them and make the tails come in neatly.
6. Add a hand-cut felt heart and the velrco backing to complete your piece of art! Hang and enjoy!

Here is how we arranged it on our wall! The "Love Always" print is a free PDF from my dear friend Martha. (found here)
Hope you enjoyed my first Pin-Interst. Now go make your own!
LOVE it!
ReplyDeletelove that! I need to make one now!
ReplyDelete